type
Post
status
Published
date
Dec 28, 2022
slug
notionnext_update_221228
summary
当 NotionNext 无法直接 Fetch upstream,又不想重新 Fork 库从头配置博客,此时采用合并 blog.config.js 文件的更新流程/方法。
category
技术分享
tags
Notion
建站
Github
NotionNext
icon
勤劳的 tangly1024 [Github][Blog] 大大又更新了 NotionNext 内容。之前的更新内容不涉及
blog.config.js 文件(配置博客唯一要更改的文件),可以直接 Fetch upstream → Fetch and merge 跟进版本。或者点击 Update branch 可以直接更新(千万不能 Discard)
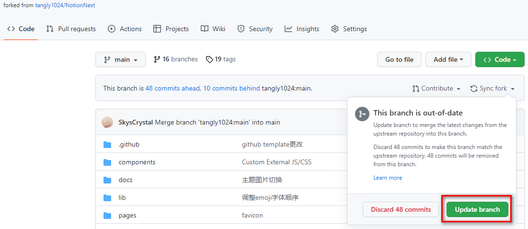
但是这次涉及到
blog.config.js 文件的修改,新旧内容冲突导致 Github “懵了”,需要手动更新。数日前就看到需要更新,今天才得以抽空完成这一“大工程”(实在是懒)。使用的软件
(1) 浏览器 [Github 已经 Fork 过 NotionNext 项目];
(2) Github desktop 客户端 [安装地址];
(3) Visual Studio Code - VS Code [安装地址].
合并步骤
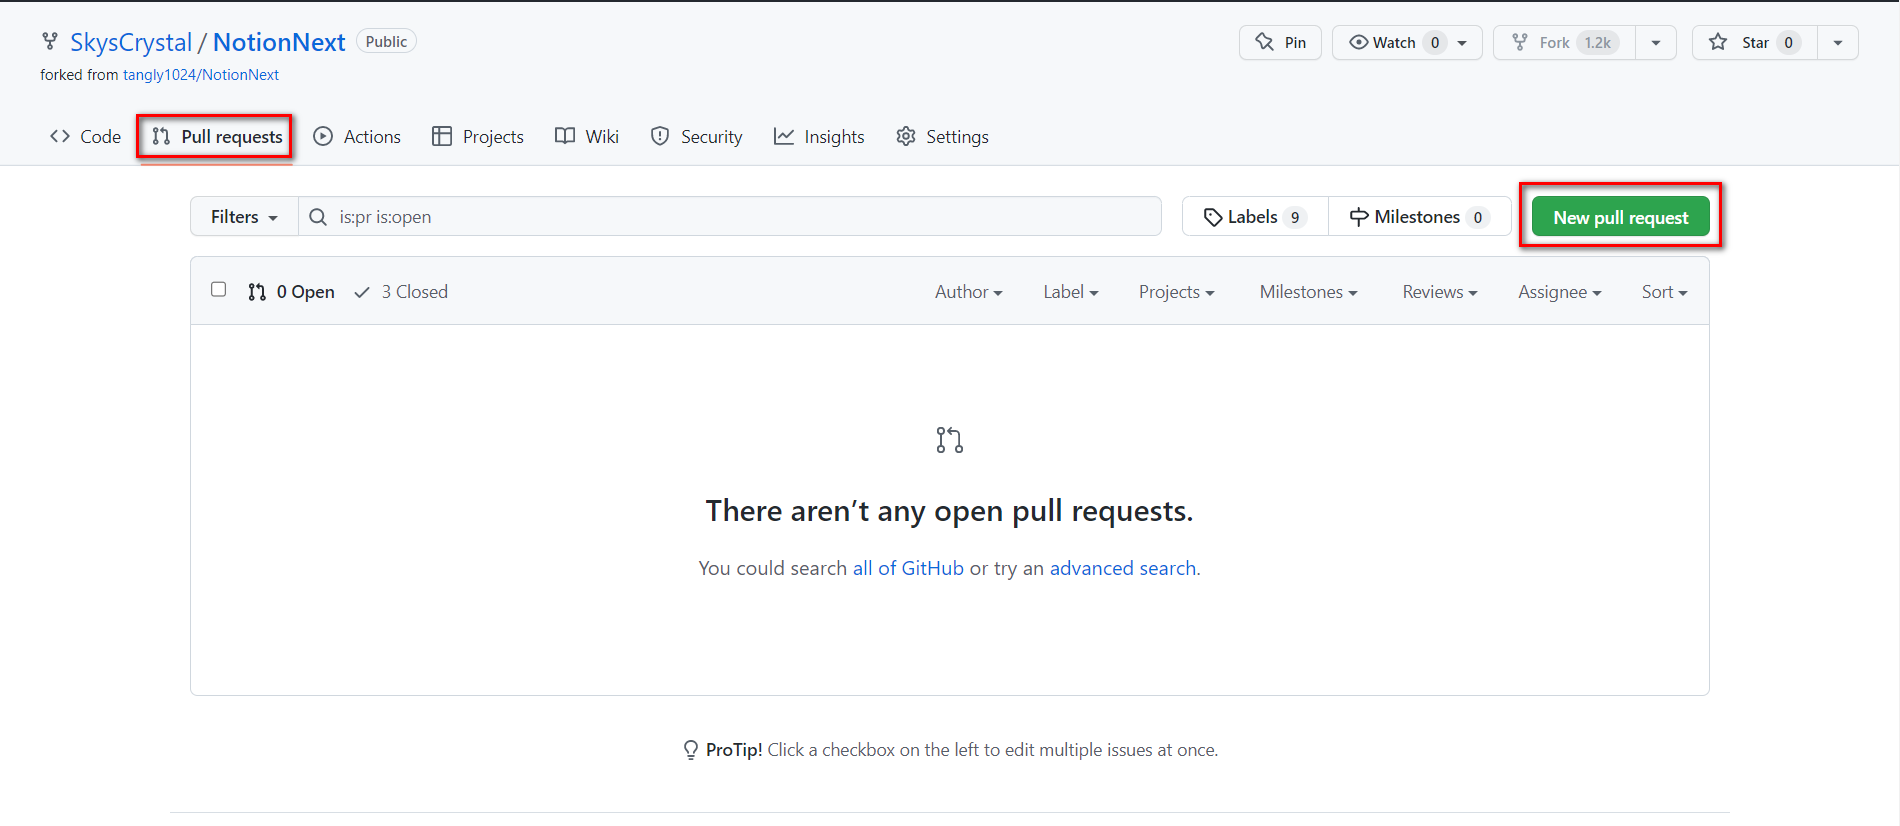
- 在浏览器中进入自己的 NotionNext 仓库;
- 点击
Pull request→New pull request创建一个合并;
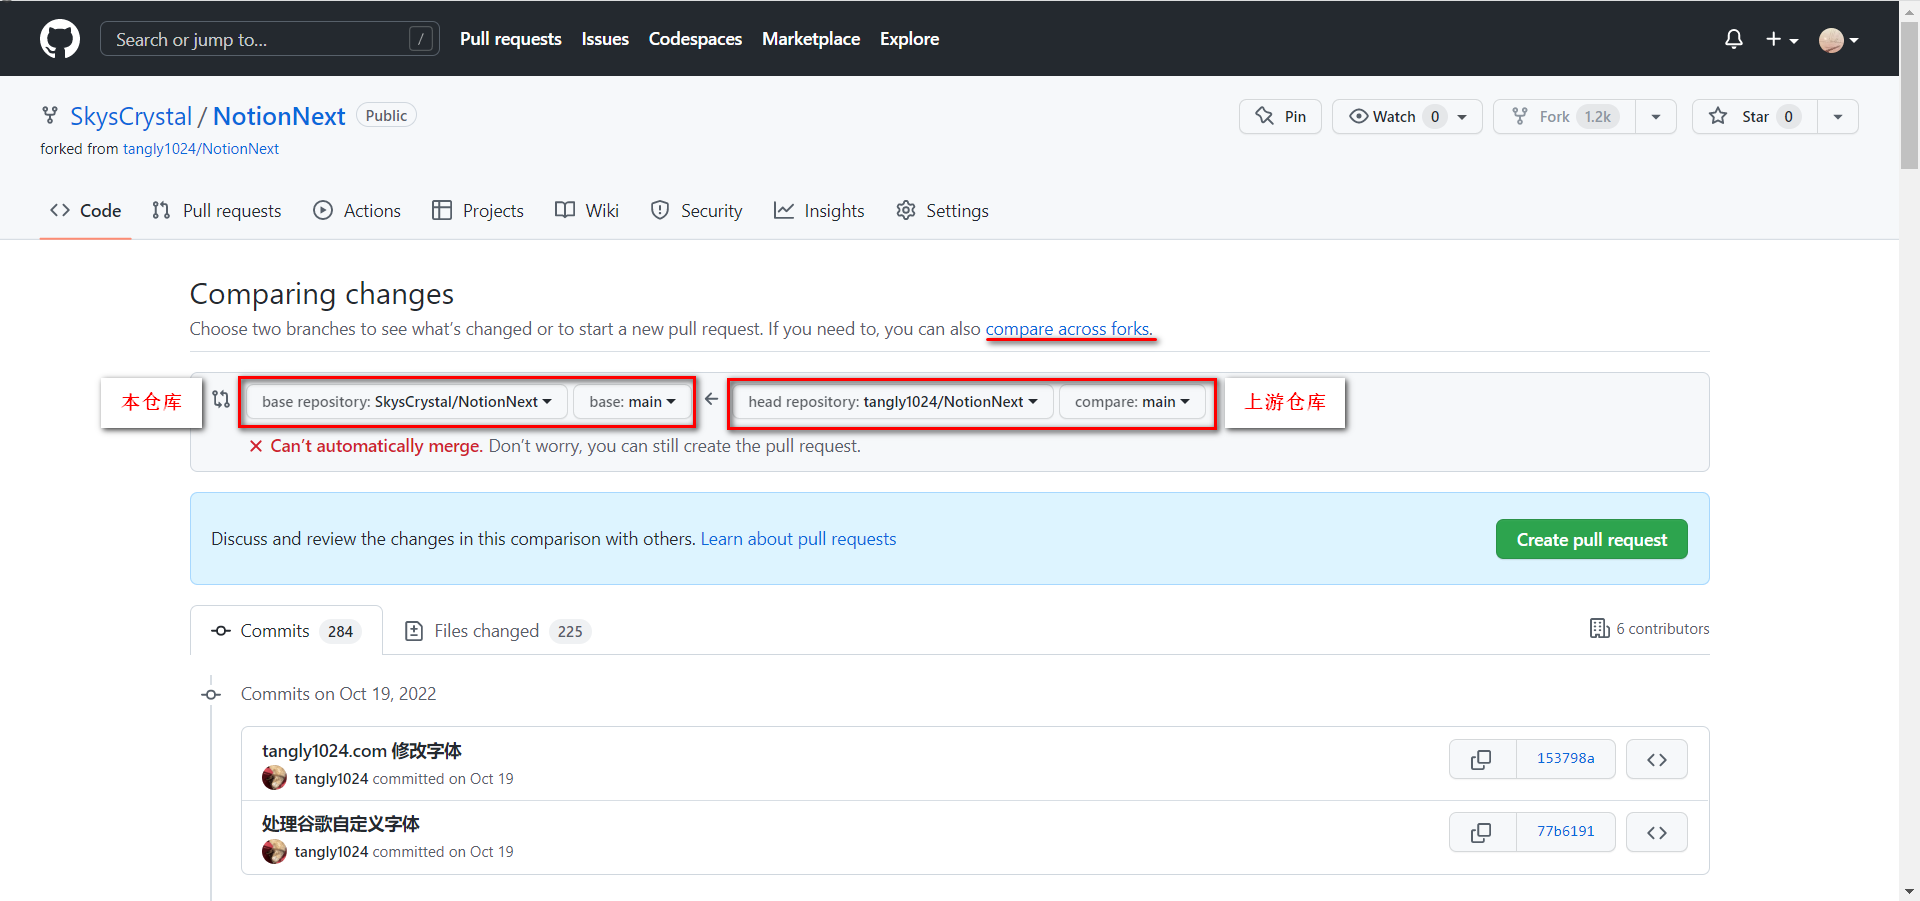
- 设置上游库指向本仓库后,点击
Create pull request(无法跨仓库则点compare across forks),设置 Title ;
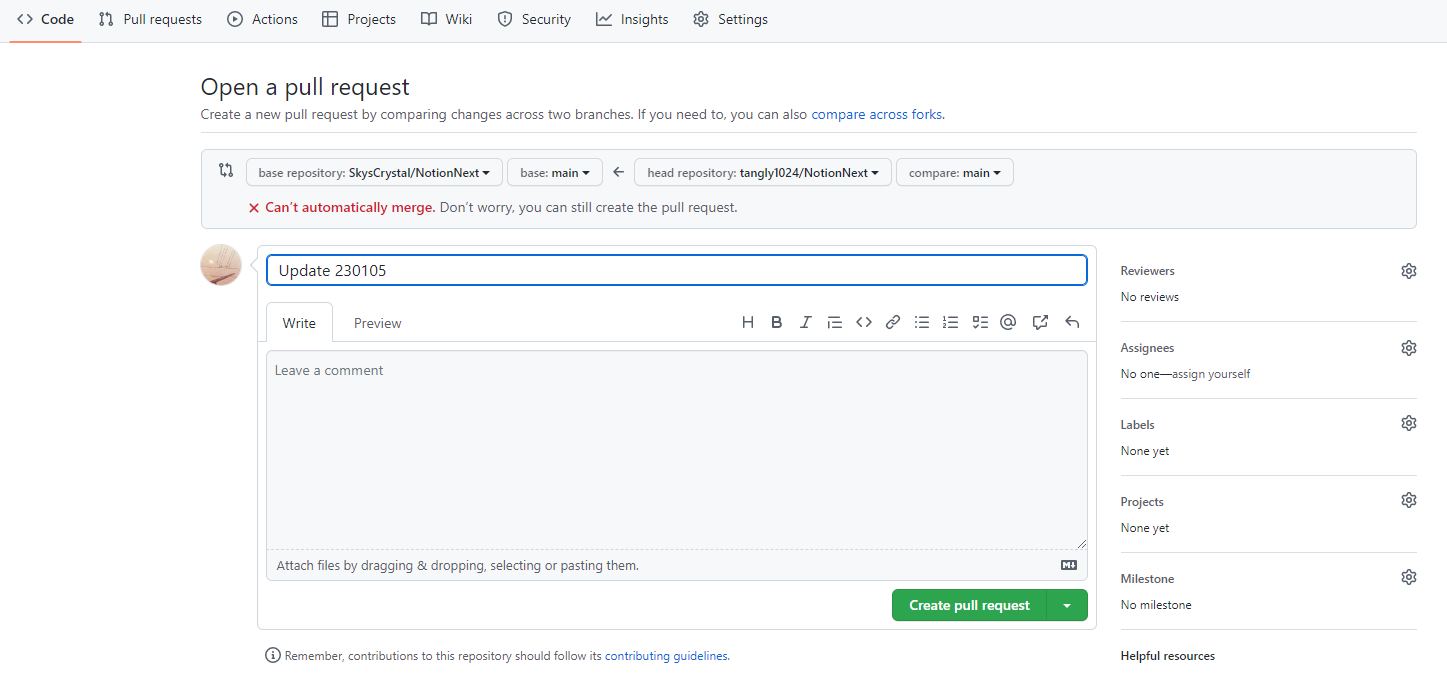
- 下拉到底,点击
open this in Github Desktop;
- 点击
command line instruction,获得两段命令step 1和step 2;
- 在打开的 Github Desktop 中点击如下选项,用 VS Code 打开本地代码;

- VS Code 打开控制台(快捷键为
Ctrl+`),复制step 1命令到 VS Code 控制台后回车;
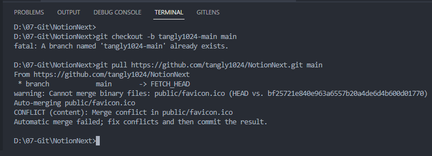
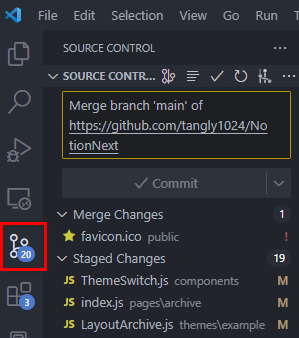
- 由左侧栏进入
Source Control,选择修改blog.config.js文件并保存,修改原则为:accept incoming change,即在新的代码中填入自己原来的设置内容,用新代码覆盖旧的代码,此处需要花费一些时间。


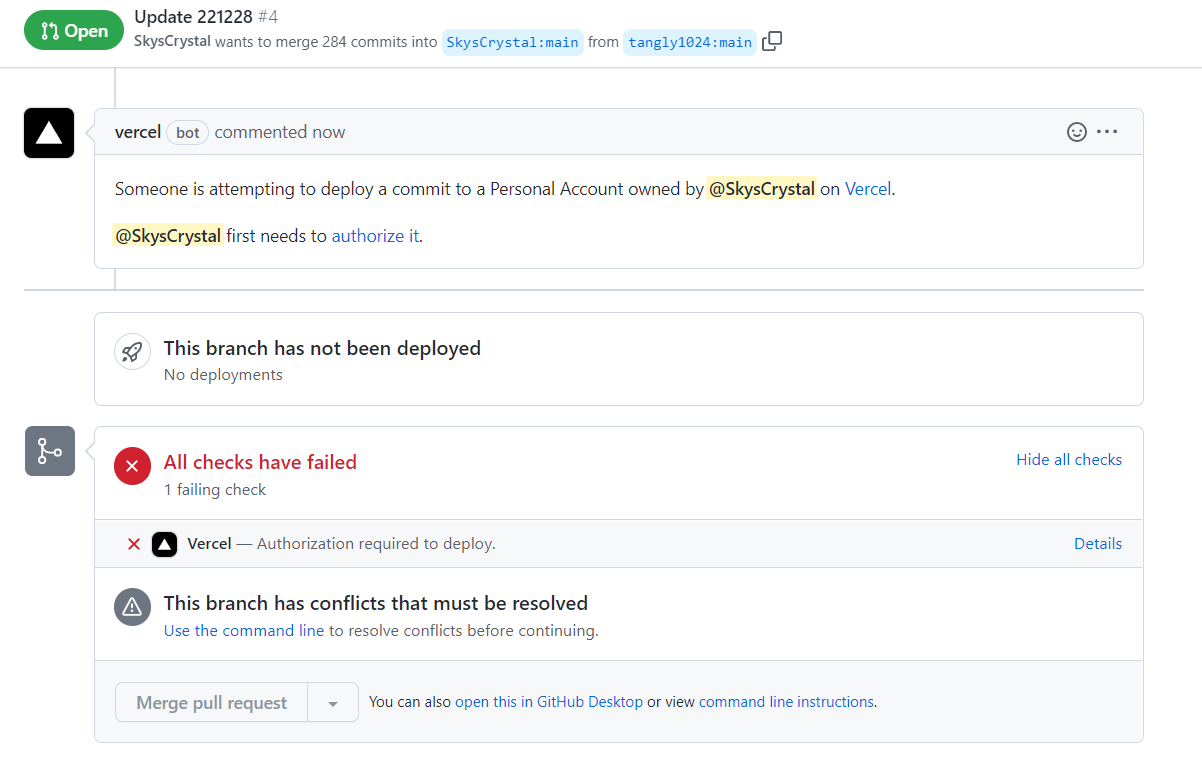
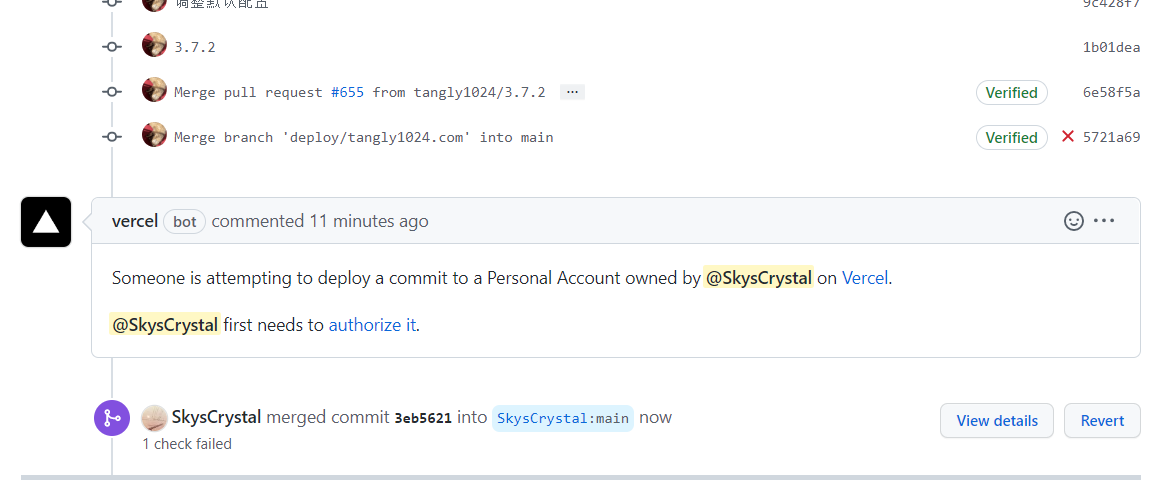
- 将修改的代码 push 到 Git 仓库,完成分支合并(参考
command line instruction中step 2命令,复制到控制台、回车;或者直接在 VS Code →Source Control中点击 Commit)。最后在浏览器中点击 authorize it 授权 vercel 部署。等待一会即可访问 NotionNext 博客。
其他问题
- 大陆地区 pull/push Github 代码可能存在连接问题,可以使用 dev-sidecar [最新 v1.73 版本下载地址] 。要注意先退出该软件再关机。建议阅读软件使用指南 [快速开始]。
结语
- 上述过程基本为图形化操作,使用的几个 Git 命令都可以在
command line instruction找到。
- 作者大大又添加了个 Twikoo 评论插件,又有新玩意儿可以尝鲜咯~